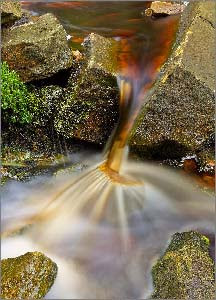
Convincing Black And White Digital Photographs
I feel comparing black and white digital photography with it's film equivalent is like comparing apples with oranges. They just are not the same thing in look and feel. I discussed this in detail in part 1 of this series. When speaking with photographer Hellen Van Meene she describe film as having "magic". Now I'm not sure what the techical term for magic is but creatively I know exactly what Hellen means.
Until very recently I didn't really feel there was anything available for the digital photographer that would add that magic to a black and white digital photograph. I already knew from bitter experience that transforming a colour digital photograph into a convincing black and white print is very difficult and can be inconsistant and unconvincing.
I felt the end results could be lacklustre and the process time consuming. Also doing excellent black and white conversion is beyond most peoples abilities. People want to take pictures not program computers. I resigned myself to shooting rolls of black and white film and paying exhobitant sums of money to develop them. This was the situation until I discovered some software called Realgrain.
Realgrain is a plugin for photoshop made by Imagenomic makers of the excellent Noiseware program. Essentially Realgrain claims to mimic the visual effect of various colour and black and white film stocks. Classic films such as Fuji Velvia 50 or Kodak Tri-X 400. I tried it out to see if these claims where true. I began by experimenting with the black and white film conversion.
Accessing the plugin is simple it sits in the menu of Photoshop with all the other filters and plugins and is simply selected from the drop down menu. Selecting a film type for conversion is equally simple. You just select a group from a drop down list. In this case Black and White Films. Then select a specific film from the second list.
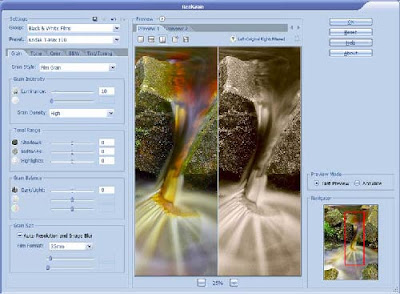
In this first screen shot I have converted the colour image at the begining of the article into a simulated Kodak Tri-X 400. I have to say that the conversion impressed me at once as this was my usual choice of black and white film stock and it looked very close to the original to me. You can also control luminance, grain density and tonal range to gain the effect you want quickly and easily.
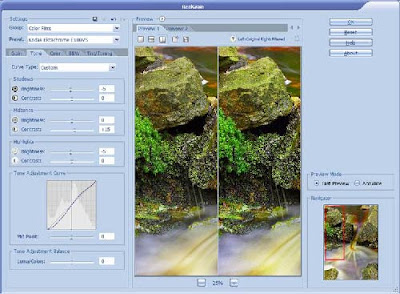
The second screenshot is a conversion to a colour film stock demonstrating that you can also adjust the tone curve for the shadows, midtones and highlights. Much as you would do in the darkroom by adjusting your developing and printing processes. Only on this occasion it's cheaper, cleaner and you have an UNDO button.
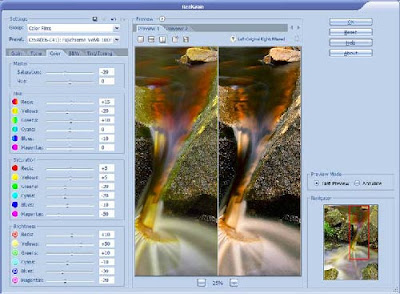
On the third screenshot i've done a simmulated cross processed effect and you can also see I have available a control pannel to take total control over the hue and saturation value of every colour in the photograph.
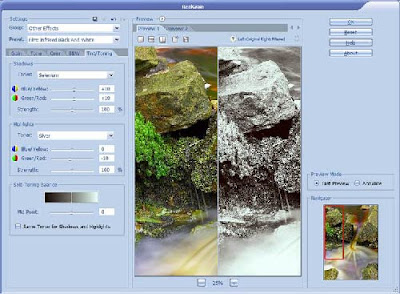
In the forth and final screenshot I have selected a simulated infrared conversion and have also showed the forth control pannel which allows you too tone the image as you would in a darkroom. With options such as Platinum/Silver available. You can also easily set the tone balance and add colour tints with the click of a mouse.
I have to say I am completely sold on this wonderful plug-in. It does it's job superbly well and is very easy and intuitive to use. It's not processor hungry so it works efficiently on any reasonable PC. I tested on a 2.6Ghz Athlon machine with 2Gb of memory and a conversion took around 6 seconds on a 60Mb .TIF file. The plug-in works on 8bit and 16bit files also. It's also a total bargain as it weighs in at a humble £45 ($90)
Please note I recommend things I like and find useful and good value. My opinion is not for sale.
No comments:
Post a Comment